Stormy (Rhodd) Hunter upholds her family’s Potawatomi traditions through beadwork and other art forms. She balances being a busy mom to five sons, a career at the Citizen Potawatomi Nation’s Cultural Heritage Center and a craftwork business with her husband Travis Hunter.
“In the hustle of working full time and meeting the needs of my family life and responsibilities, I can always find my own personal identity in something that I have created,” Hunter said.
She believes knowledge is not something one should own and upholds this value by teaching others every chance she gets.
“It is vital to our survival that this knowledge is shared and available for all who want to learn and share in the responsibility of keeping the tradition of creation alive,” she added.
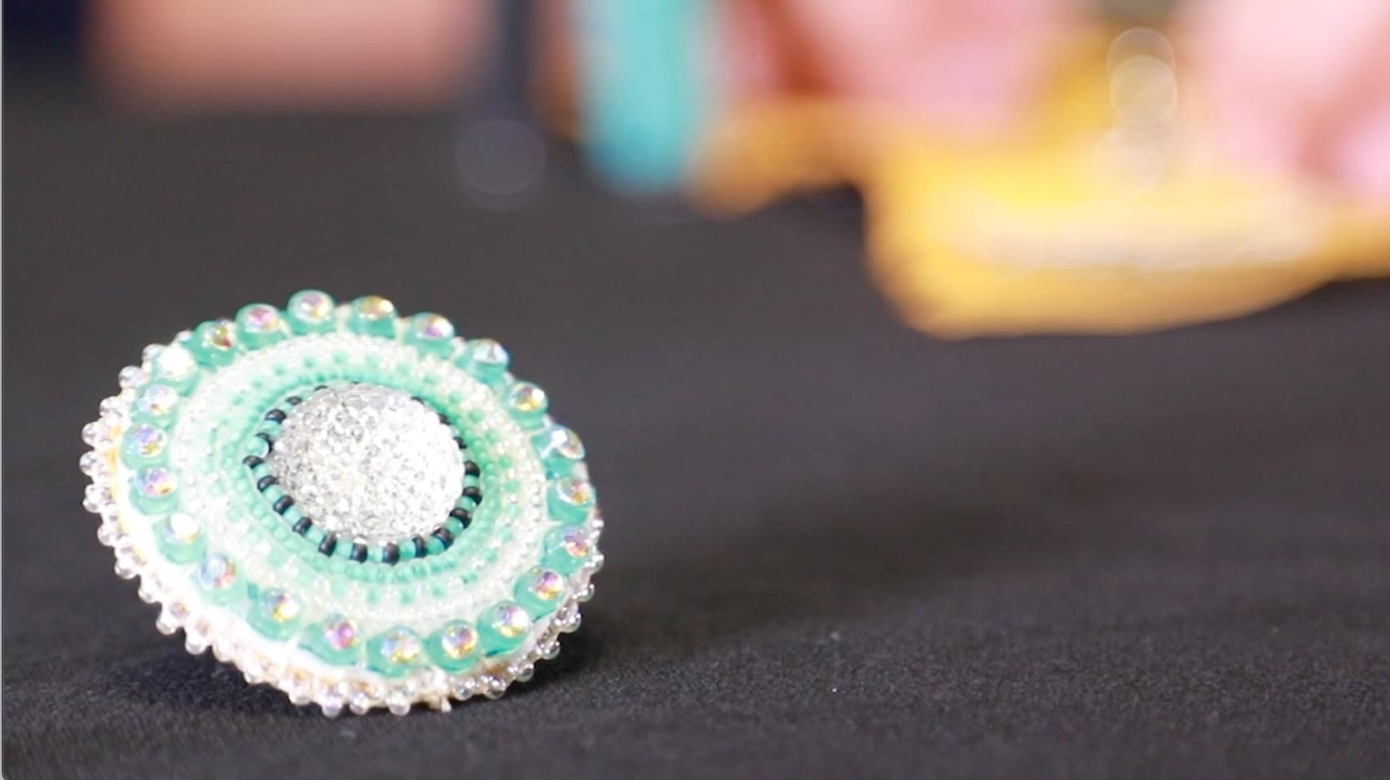
In the spirit of reciprocity, Hunter developed a step-by-step tutorial on how to create a two-needle applique ring. Potawatomi Gifts sells a kit with all the supplies needed at potawatomigifts.com.
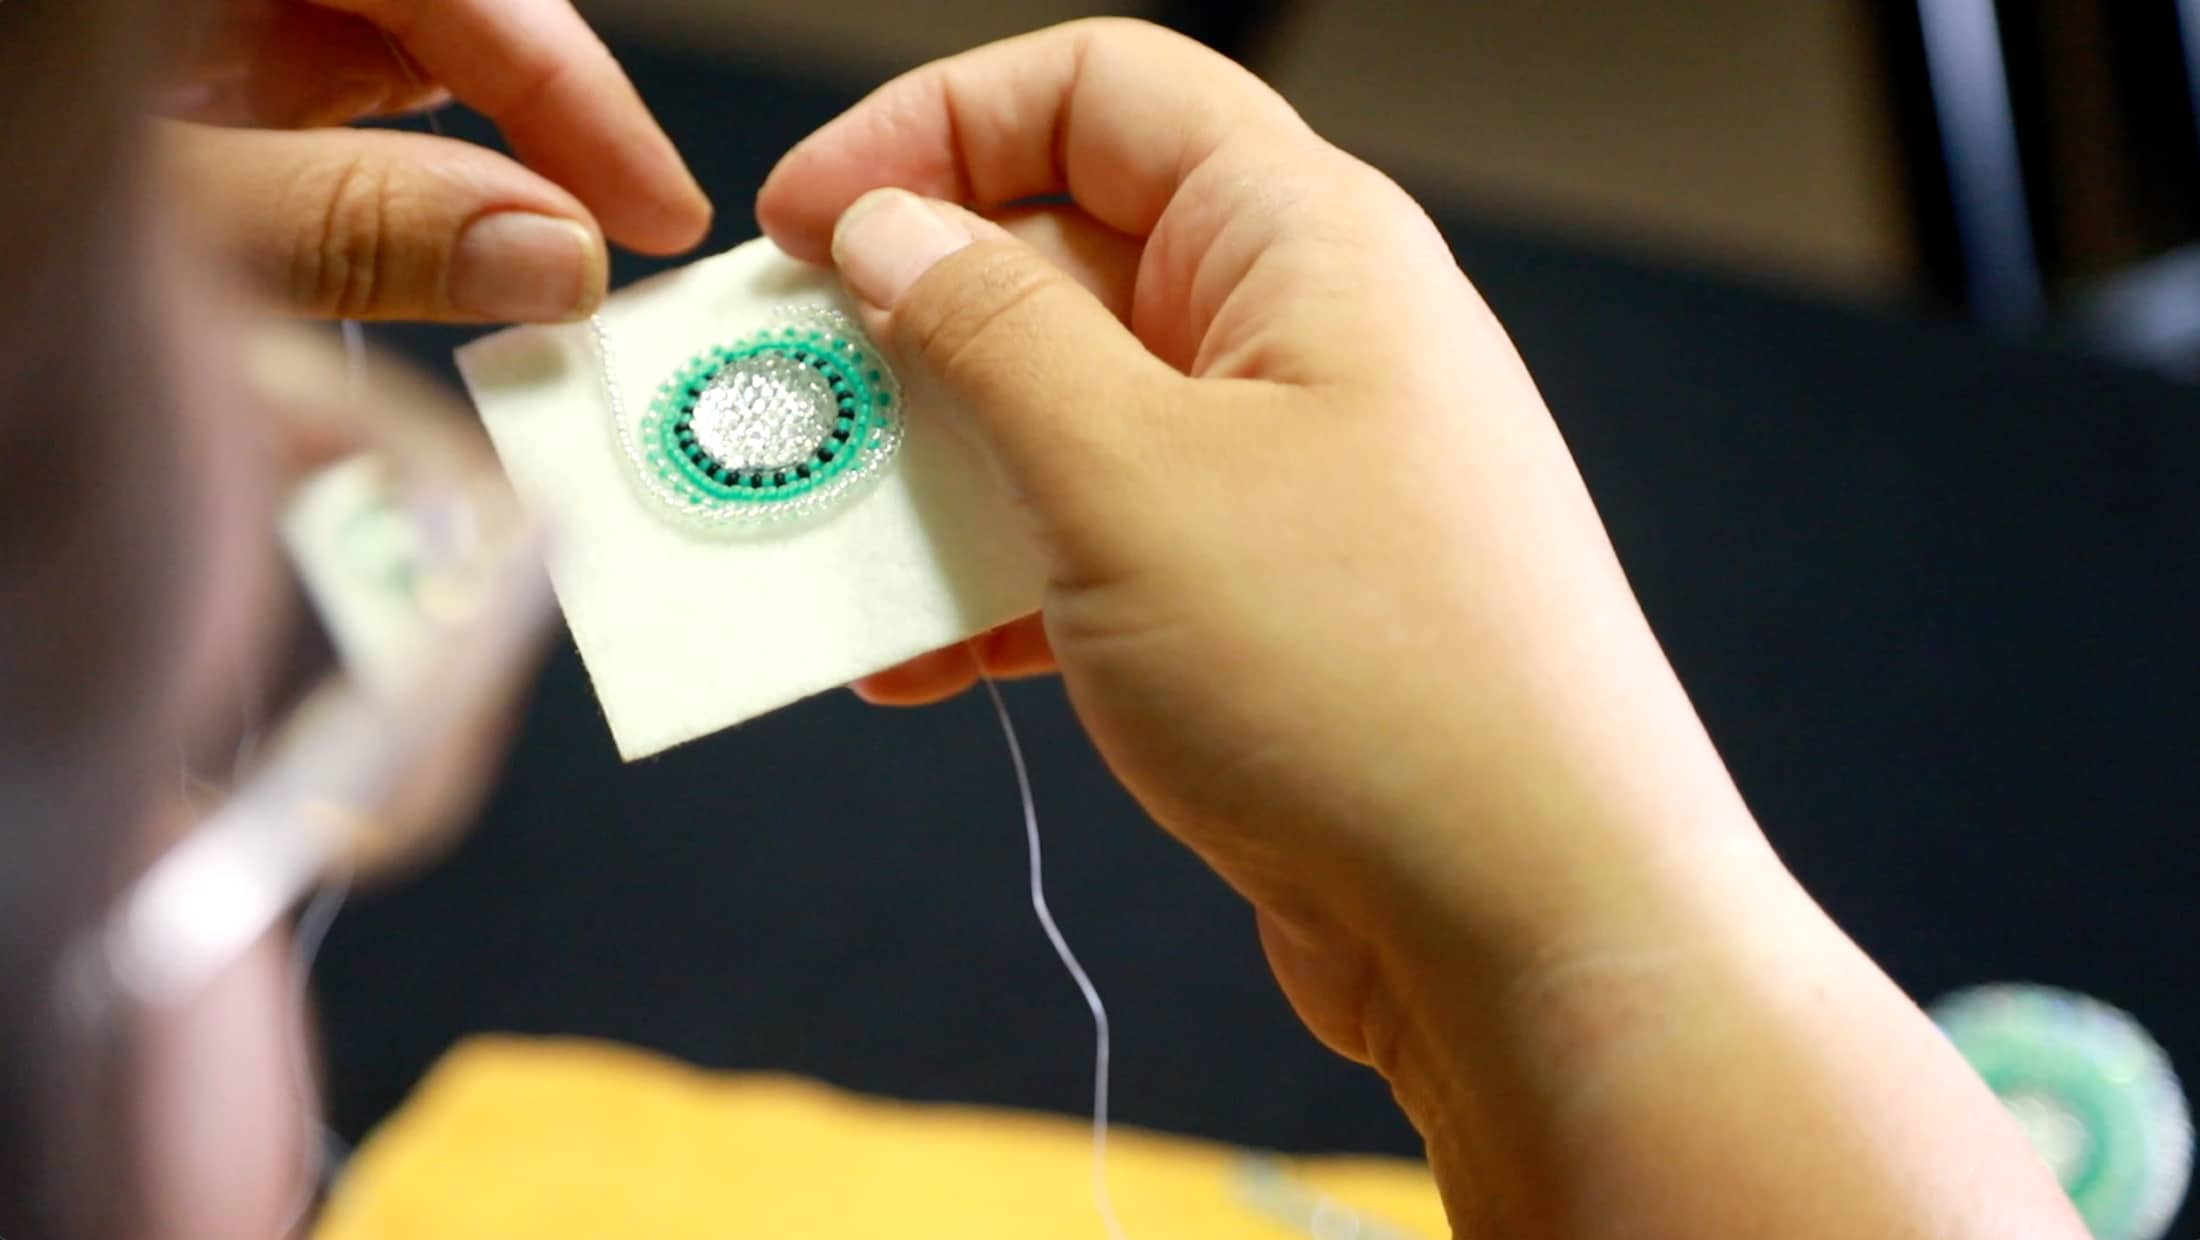
Two-needle applique utilizes two threaded needles. Needle one helps get the beads onto the project while needle two secures the beads in place.
Hunter stressed that there are several approaches to beaded applique, and the tutorial featured reflects the best method for her personal style.
“I found that the beads lay smoother and more uniform. … I think with pieces like this ring, it is important to know that it’s easier to fill in a space by going through the next bead instead of crowding and making beads bunch up too much,” she said.
To learn her technique, follow these directions:
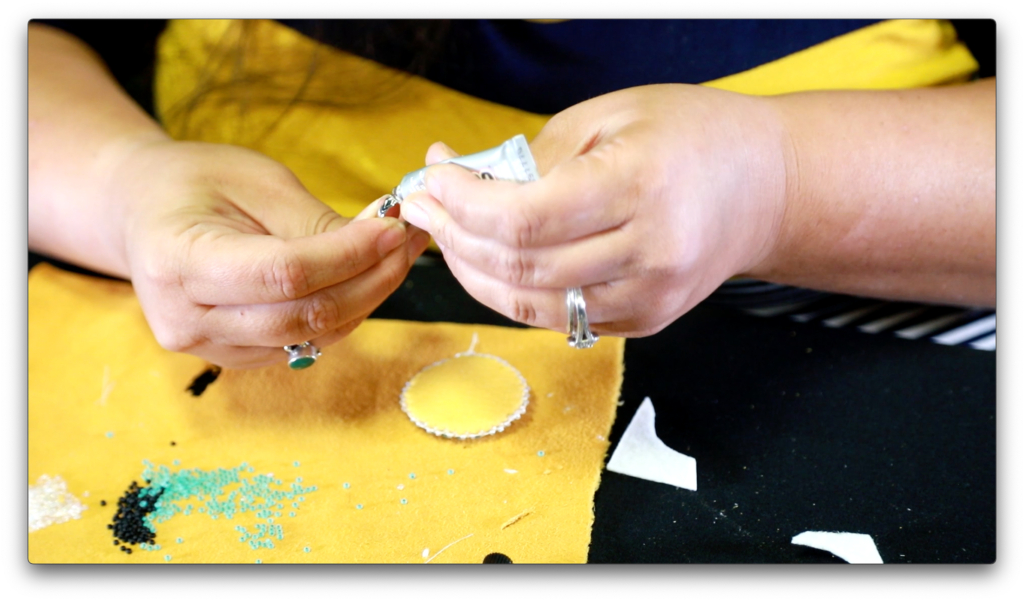
- 1. Glue a center stone to the felt, and allow it to dry. Hunter recommends E6000 glue.
- 2. Cut two pieces of string approximately a yard long each. The kit includes size B thread.
- 3. Apply beeswax to both strings. This helps strengthen the thread and prevents fraying.
- 4. Create two single-threaded needles using the waxed strings and the two beading needles provided in the kit. Deciding which size needles to use depends on the size of beads. The kit features size 11 seed beads and size 12 needles. Other techniques utilize a single and double-threaded needle, but Hunter prefers using two singles.
- 5. Take needle number one through the felt from the back, as near to the center stone as possible, and pull through.
- 6. Take needle two, and do the same, drawing it through as near to the center stone as possible. Once complete, keep needle two out of the way. It will be utilized later in the project.
- 7. Using the needle one, begin picking up beads in a black and blue alternating pattern until there are enough to completely surround the center stone.
- 8. Secure the line of beads by pushing needle one through the felt to the back.
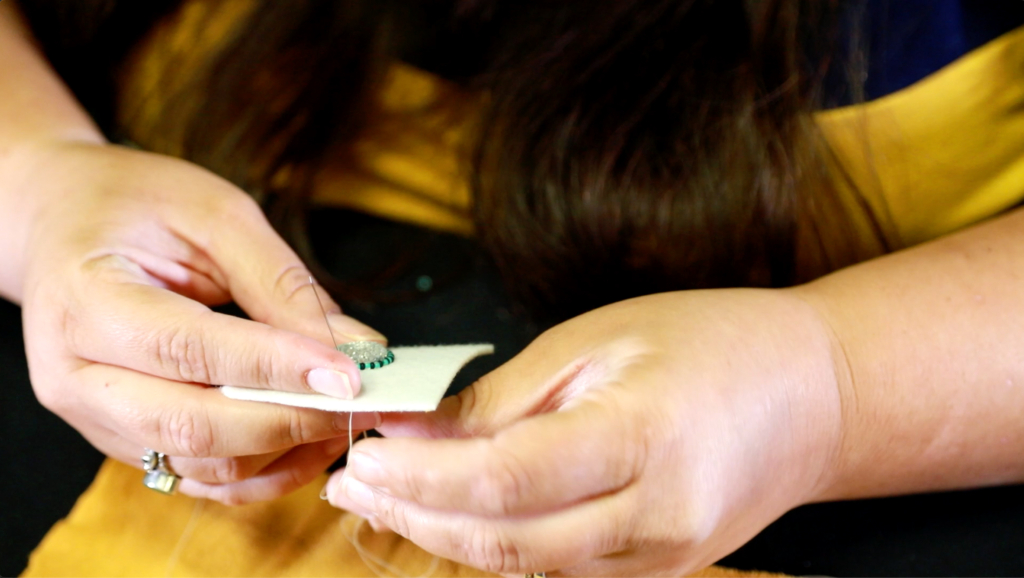
- 9. Pick up needle two that was set out of the way, and attach every two beads by tacking the string down between the two beads.
- 10. Go all the way around until the last bead. Next, pull needle two through the last bead then through to the back of the felt.
- 11. Bring needle one back to the front of the project, as near to the first row of beads that were just secured as possible. Now, it is time to begin on the second row.
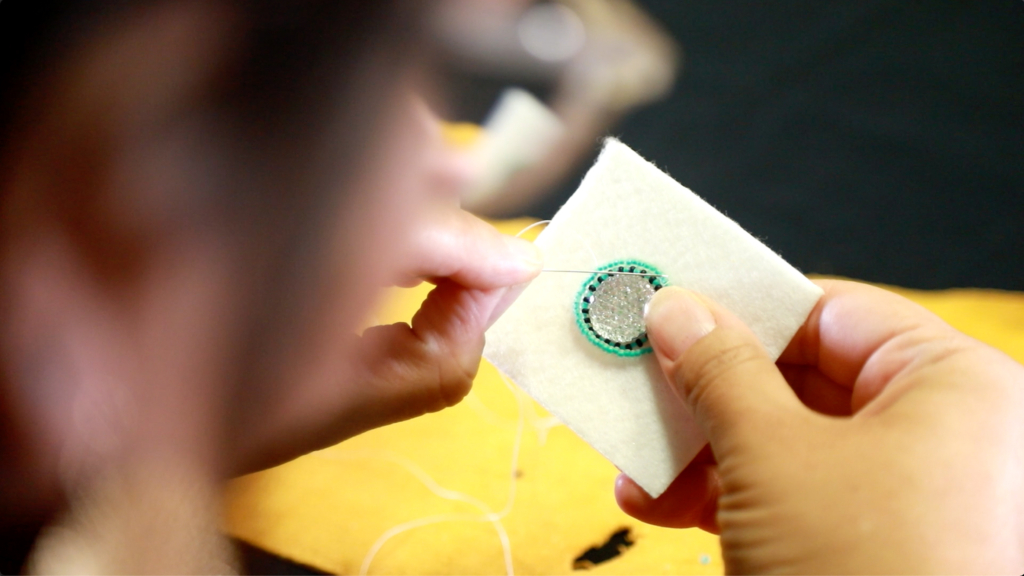
- 12. Using needle one, pick up enough blue beads to completely surround the first row, then repeat steps eight through 10.
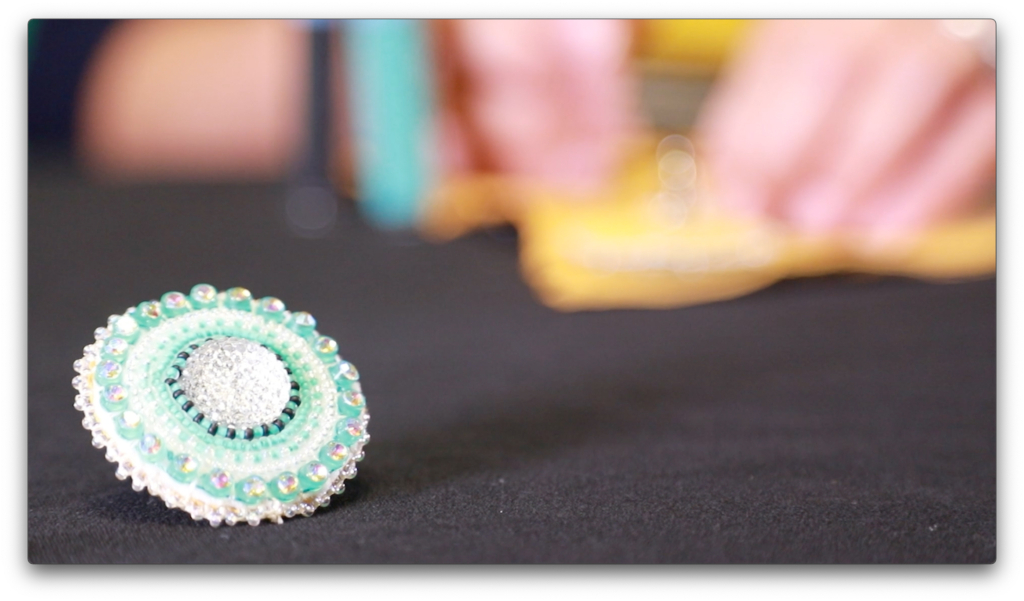
- 13. To begin the third row, use needle number one and pick up beads in an alternating white and blue pattern until the beads fit all the way around the project.
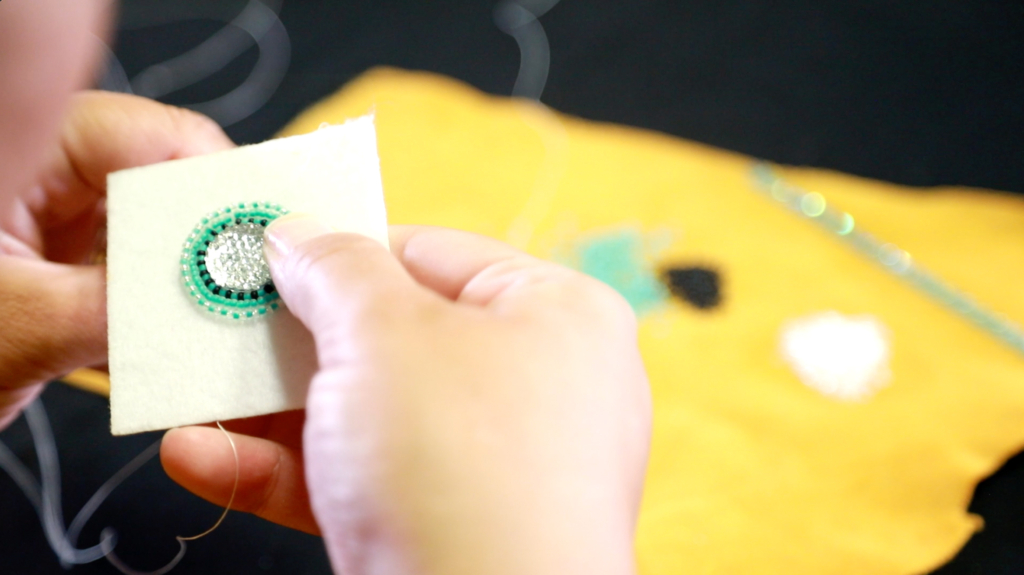
- 14. Repeat steps eight through 10 on the third row.
- 15. For the fourth row of beads, use needle number one to pick up all white beads to fit completely around the project.

- 16. Repeat steps eight through 10.
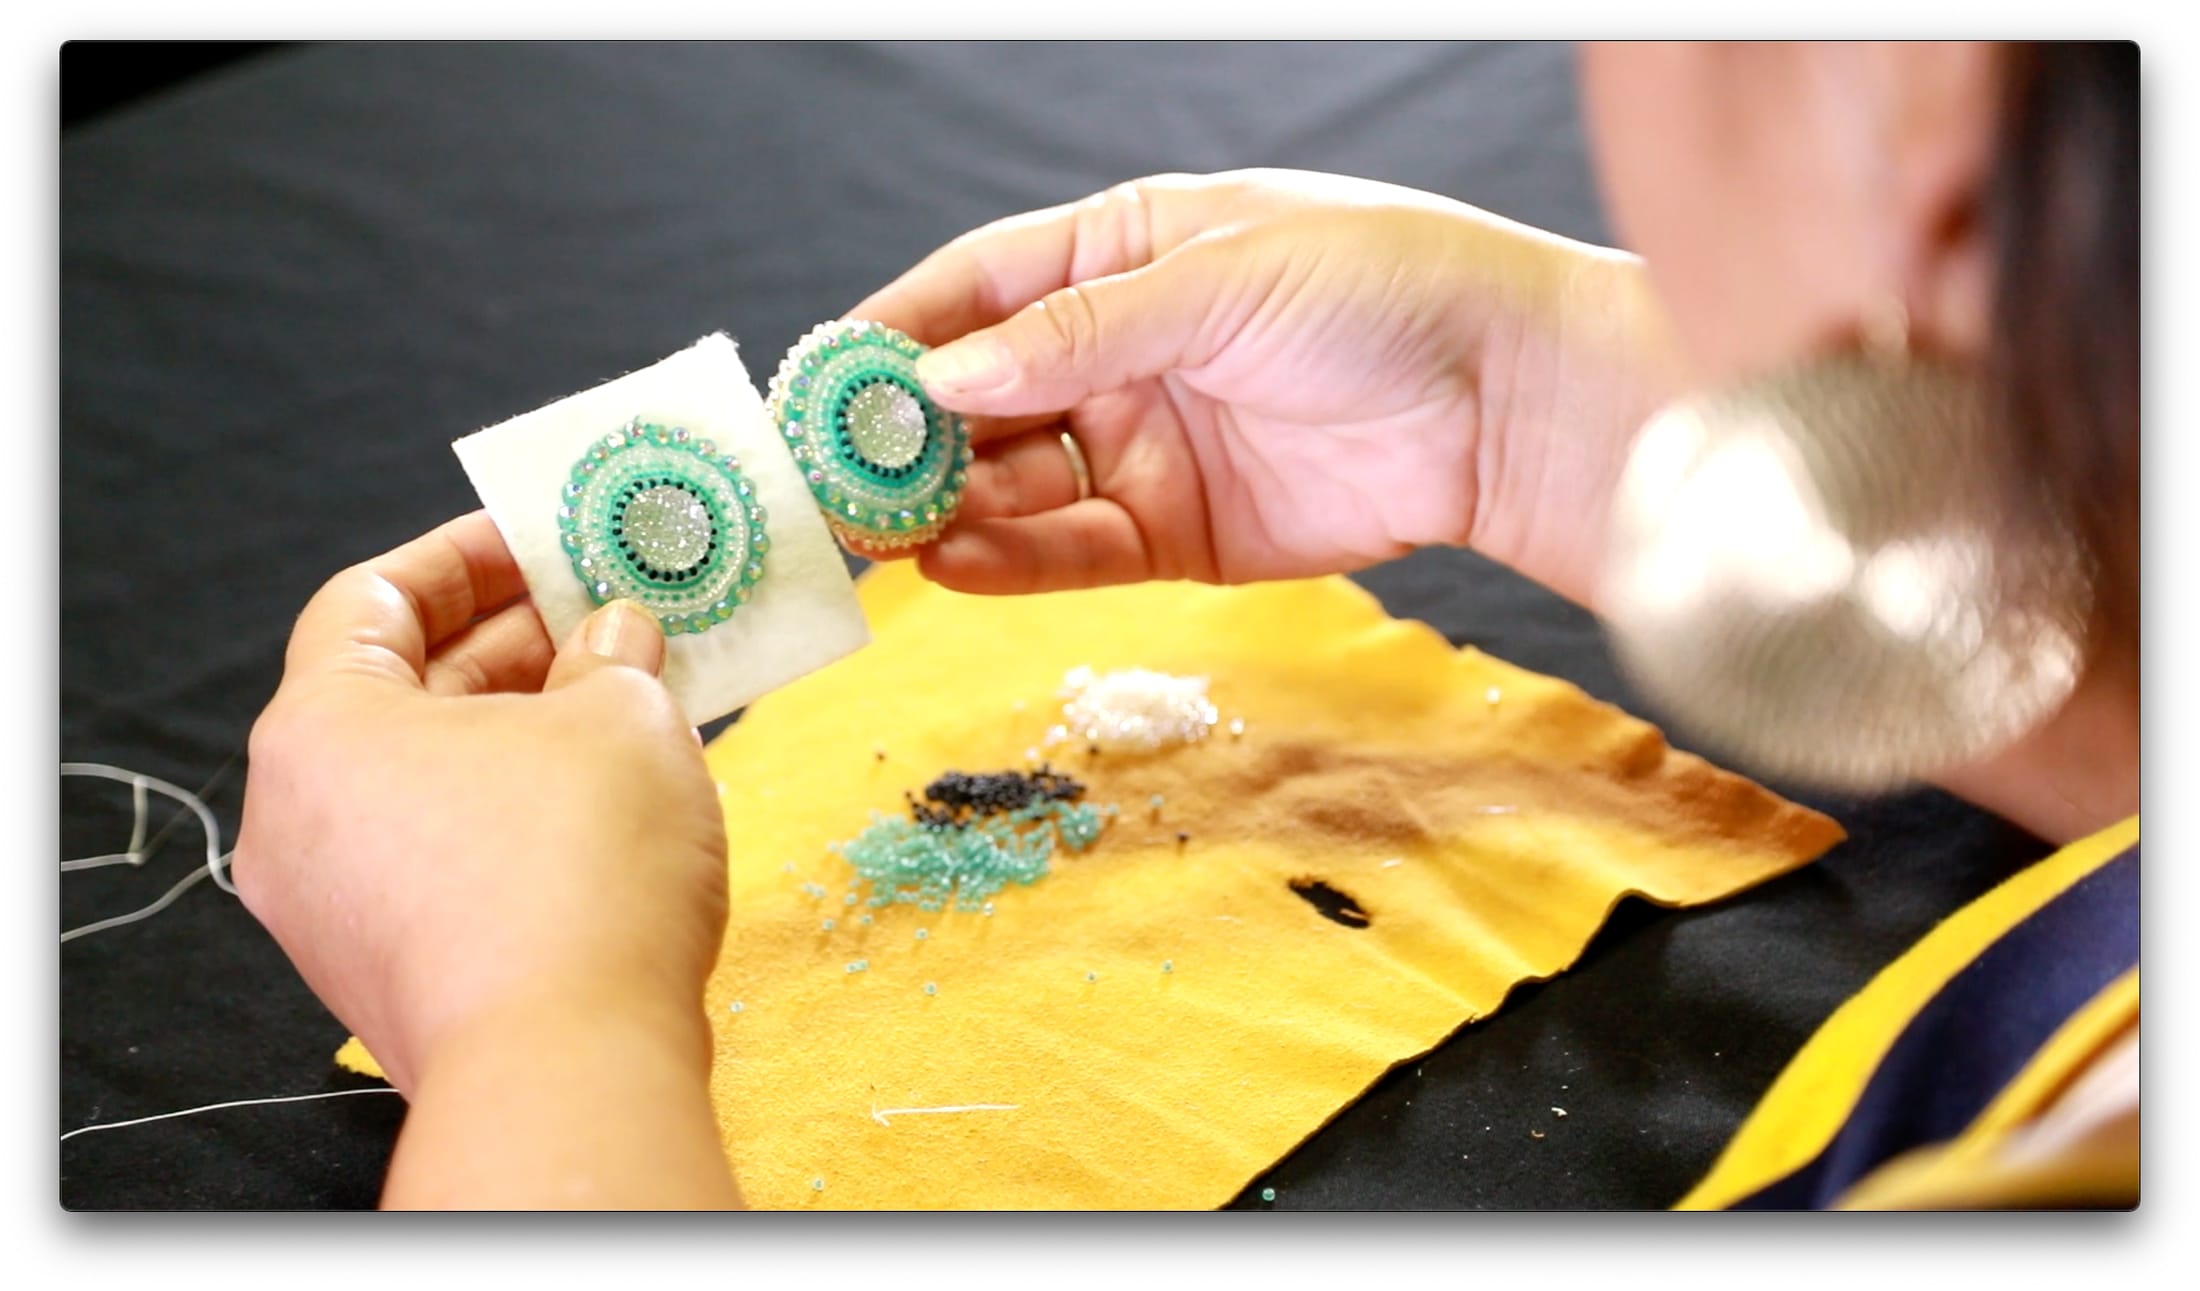
- 17. Once the fourth row is completely secure, make sure both needles are on the back side of the felt and double knot together. Then cut one of the threads at the knot, leaving one threaded needle still attached.
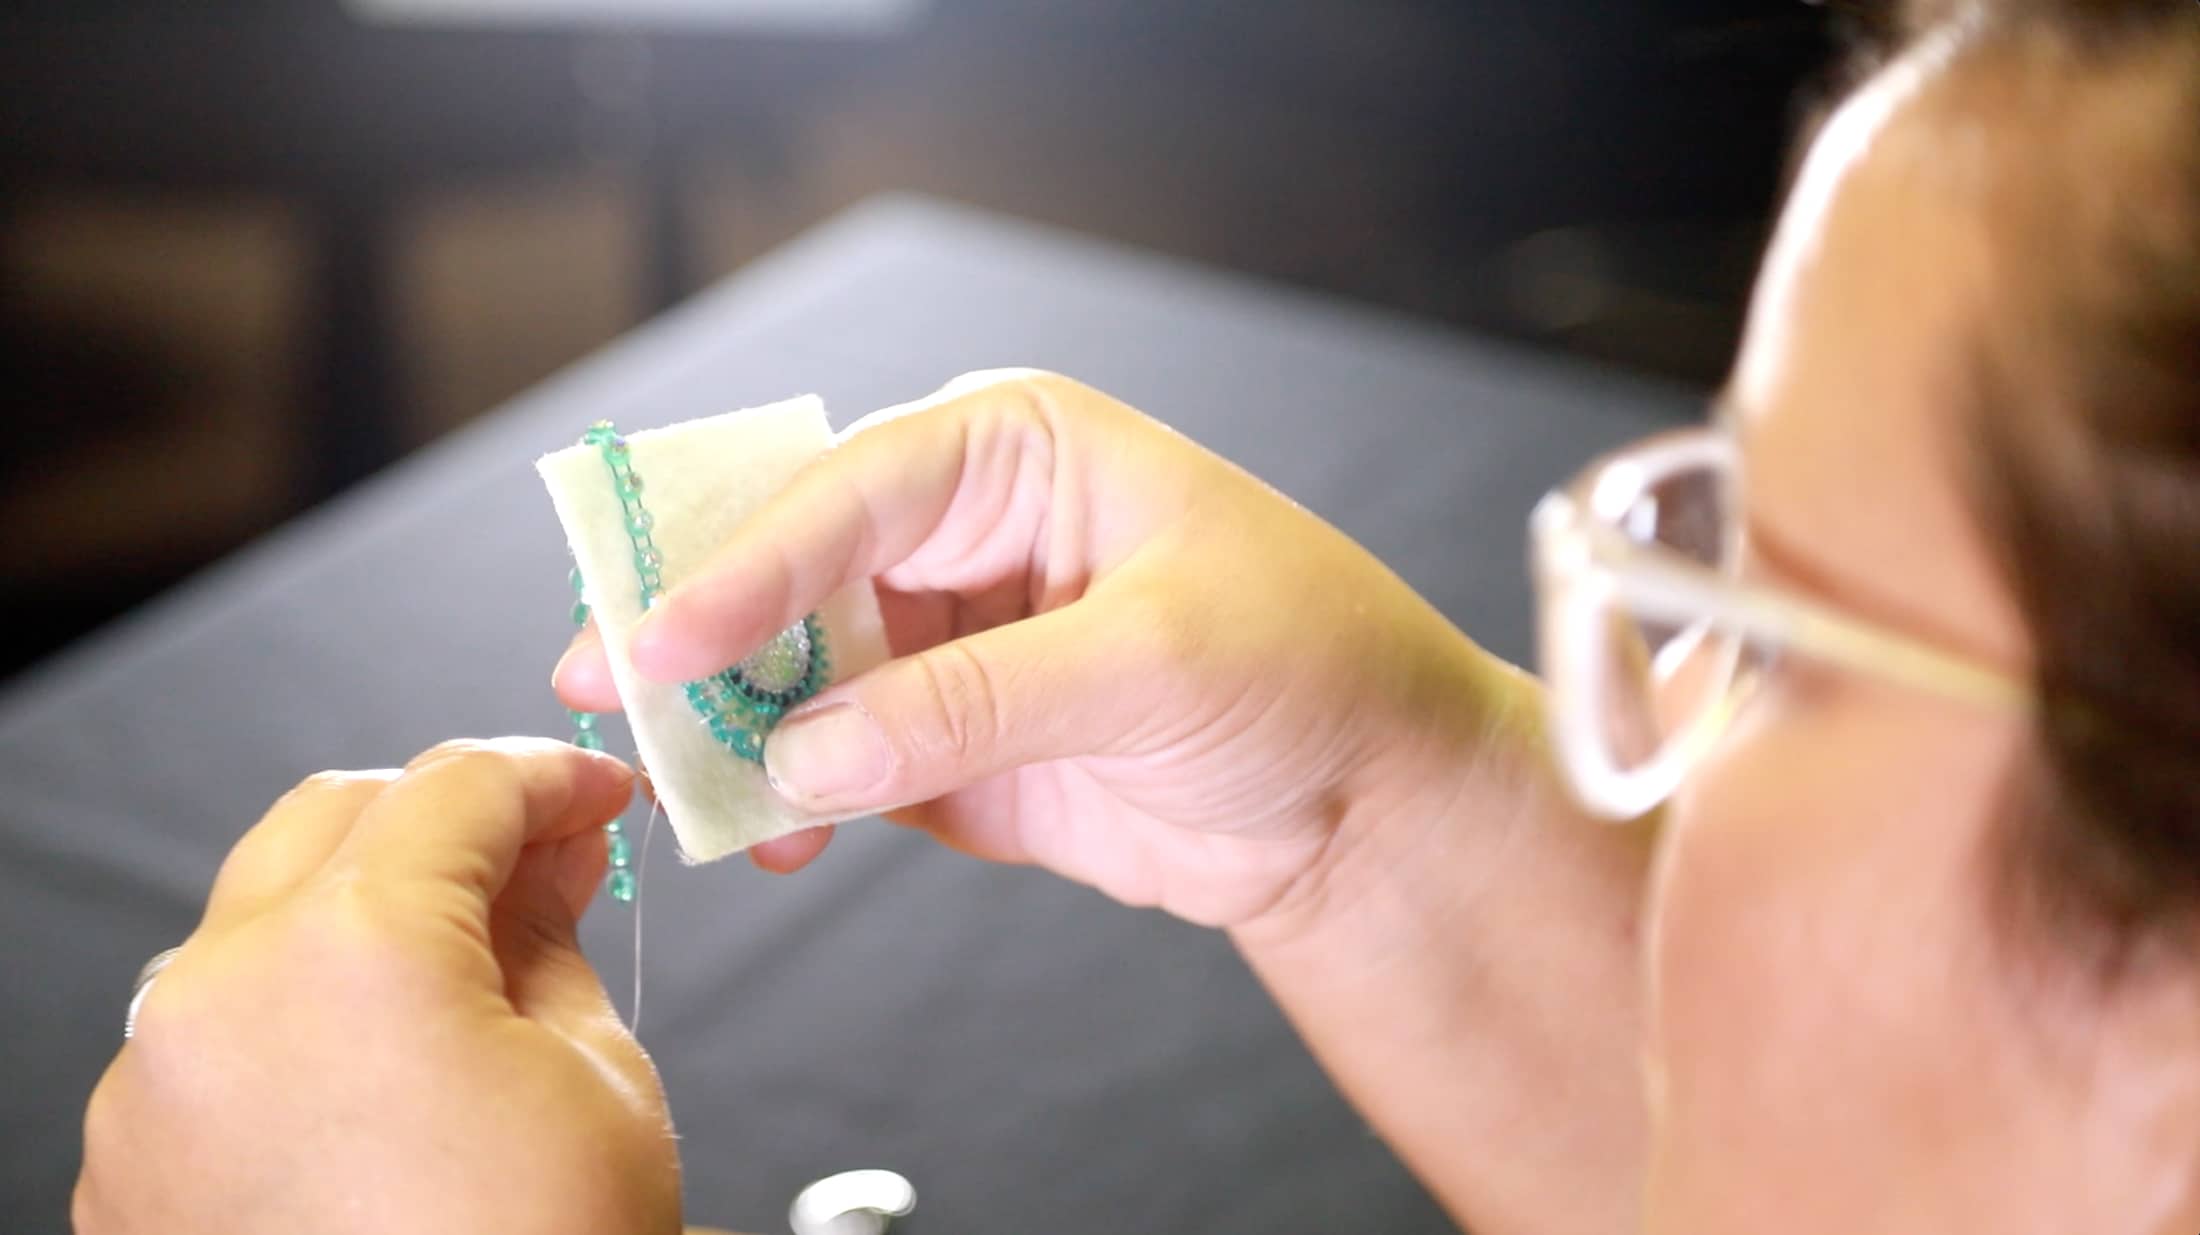
- 18. Take the rhinestones provided in the kit and place them around the project, getting an idea of how it will look and the exact length of rhinestones needed. Cut off excess.

- 19. With the remaining single threaded needle, attach each rhinestone. This is similar to how the needle two was used in prior steps to secure the beads.
- 20. Once each rhinestone has been attached, knot the thread on the back of the felt and cut the thread as near to the knot as possible.
- 21. Grabs scissors to cut out the project, but be careful not to cut any of the thread that holds the beadwork together.
- 22. Burn or cut off excess thread.

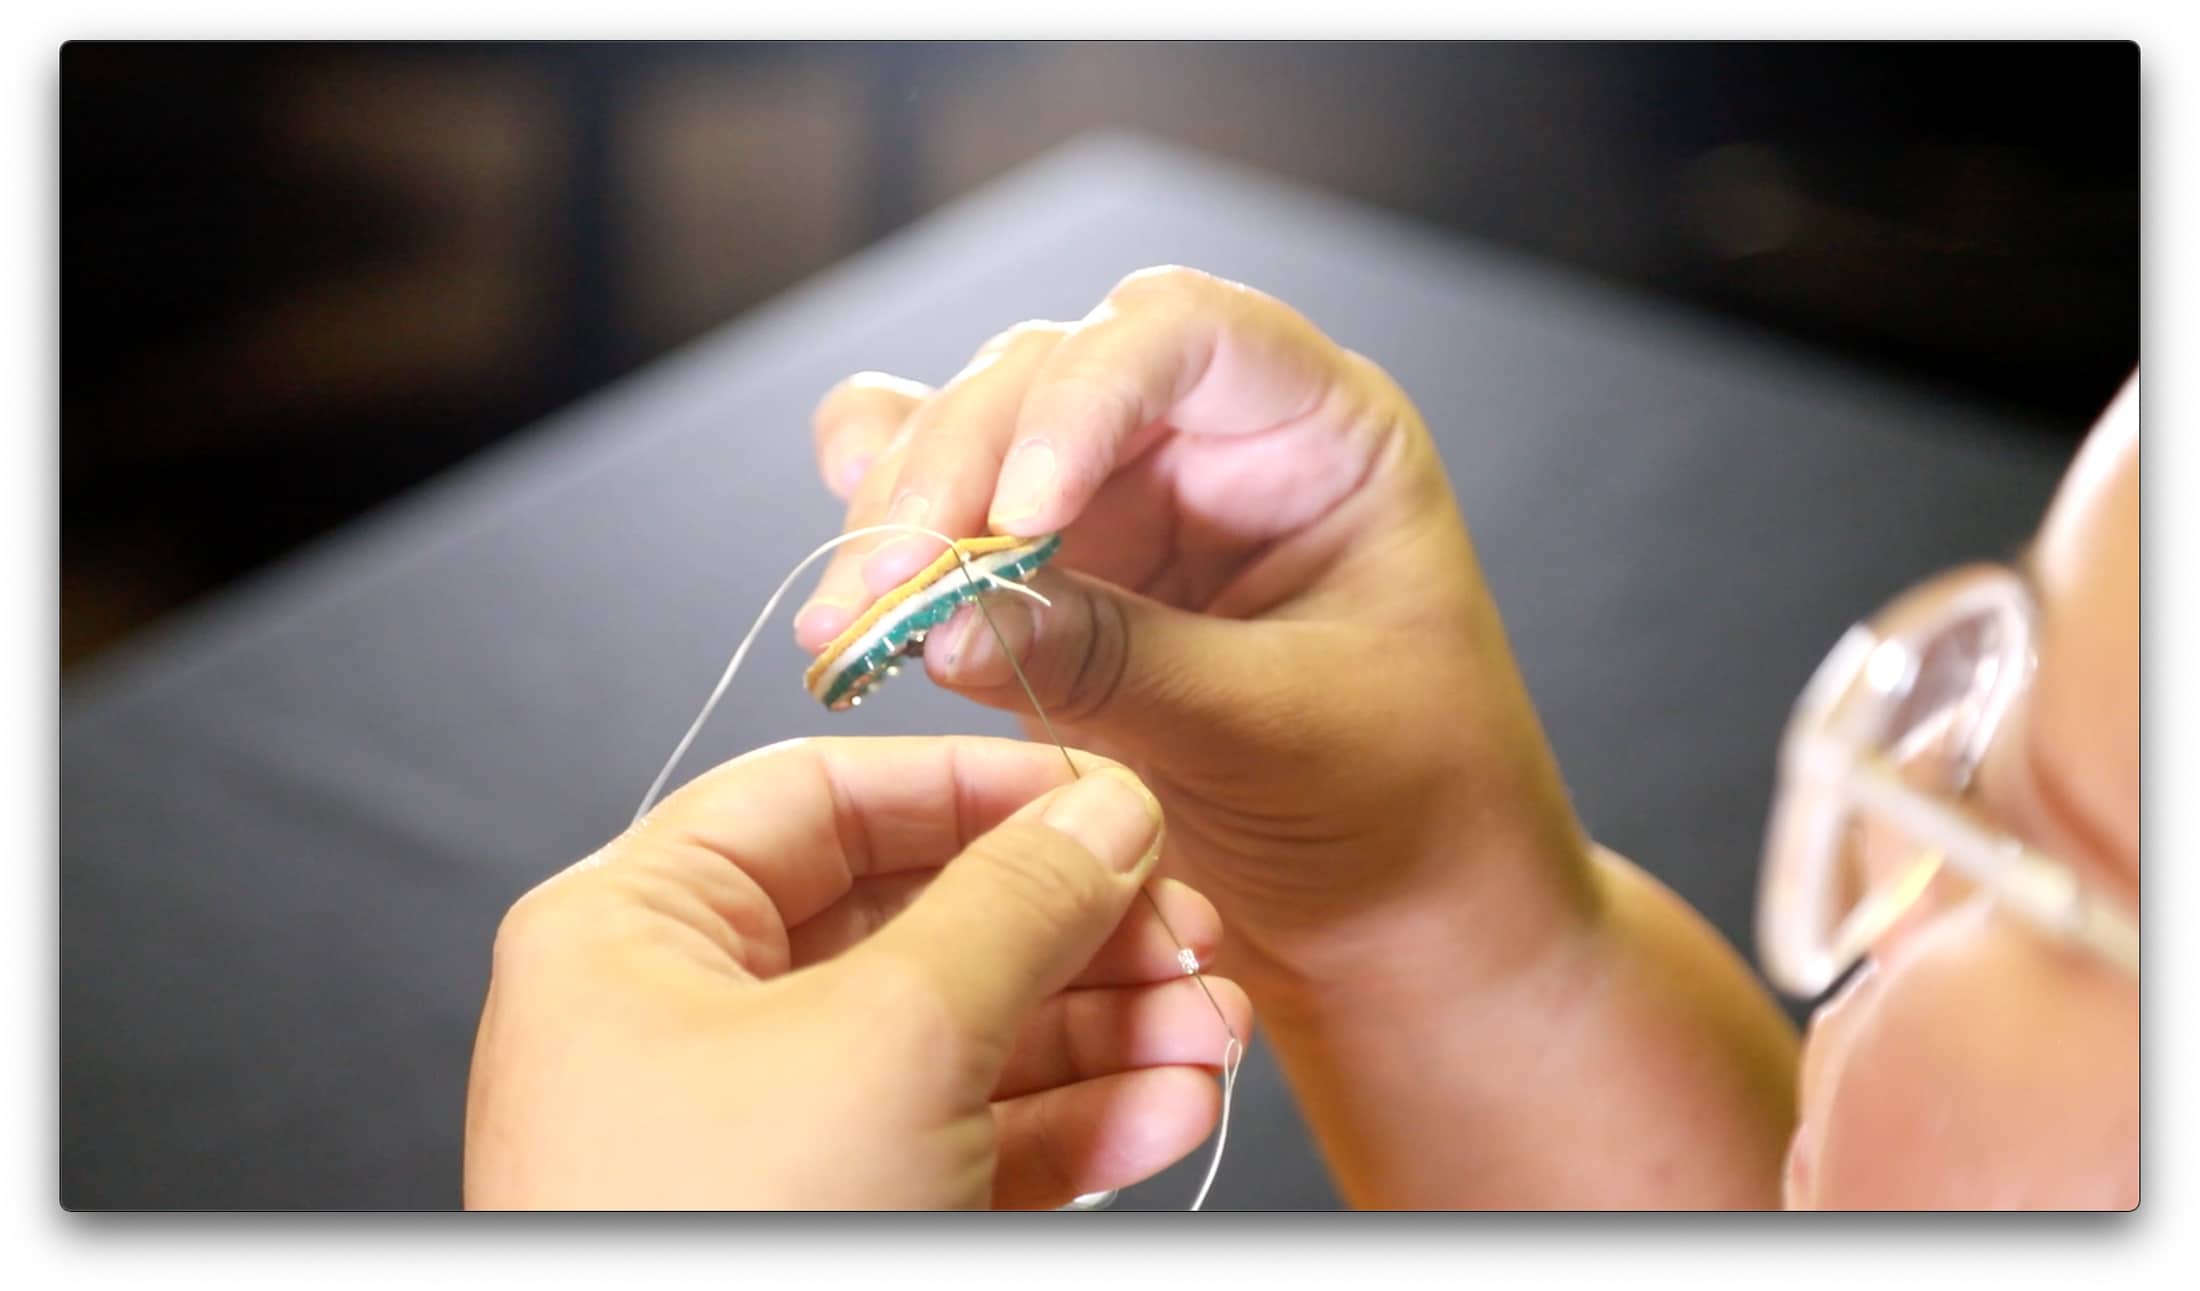
Now it’s time to begin the project’s last part: finishing with leather backing and creating a beaded edge.
- 23. Cut out a piece of leather that matches the project’s size. Feel free to mark the size required with a pencil or other writing utensil before cutting.
- 24. Apply wax to a piece of thread approximately 2-3 feet in length.
- 25. Then double thread a needle.

- 26. Take the needle through an edge of the leather and the beadwork project.
- 27. Use the needle to pick up two white beads.
- 28. Take the needle through the second bead.
- 29. Make sure the edging lies sideways before picking up two more white beads.
- 30. Take the needle through the second bead just like before, and then pull through both the project and leather layers.

- 31. Repeat and follow all the way around.
- 32. Knot at the end.
- 33. Cut or burn off excess.
- 34. Place the ring on the back of the project in the center using glue. Hunter recommends E6000.
- 35. Let it dry, then enjoy!
Find the kit here on potawatomigifts.com. Hunter welcomes questions by calling the CHC at 405-878-5830.